



On this pageStart With What You Are Actually Seeing7 sections+6
Quick answer
Wood stove repair covers a small set of parts that sit in direct flame: the door gasket, the ceramic door glass, the firebrick lining, the baffle, and the secondary air tubes. Those are consumables designed to be replaced, and several are owner-serviceable. Smoke entering the room, a separating stovepipe joint, or a crack through the firebox means stop burning and have the system inspected.
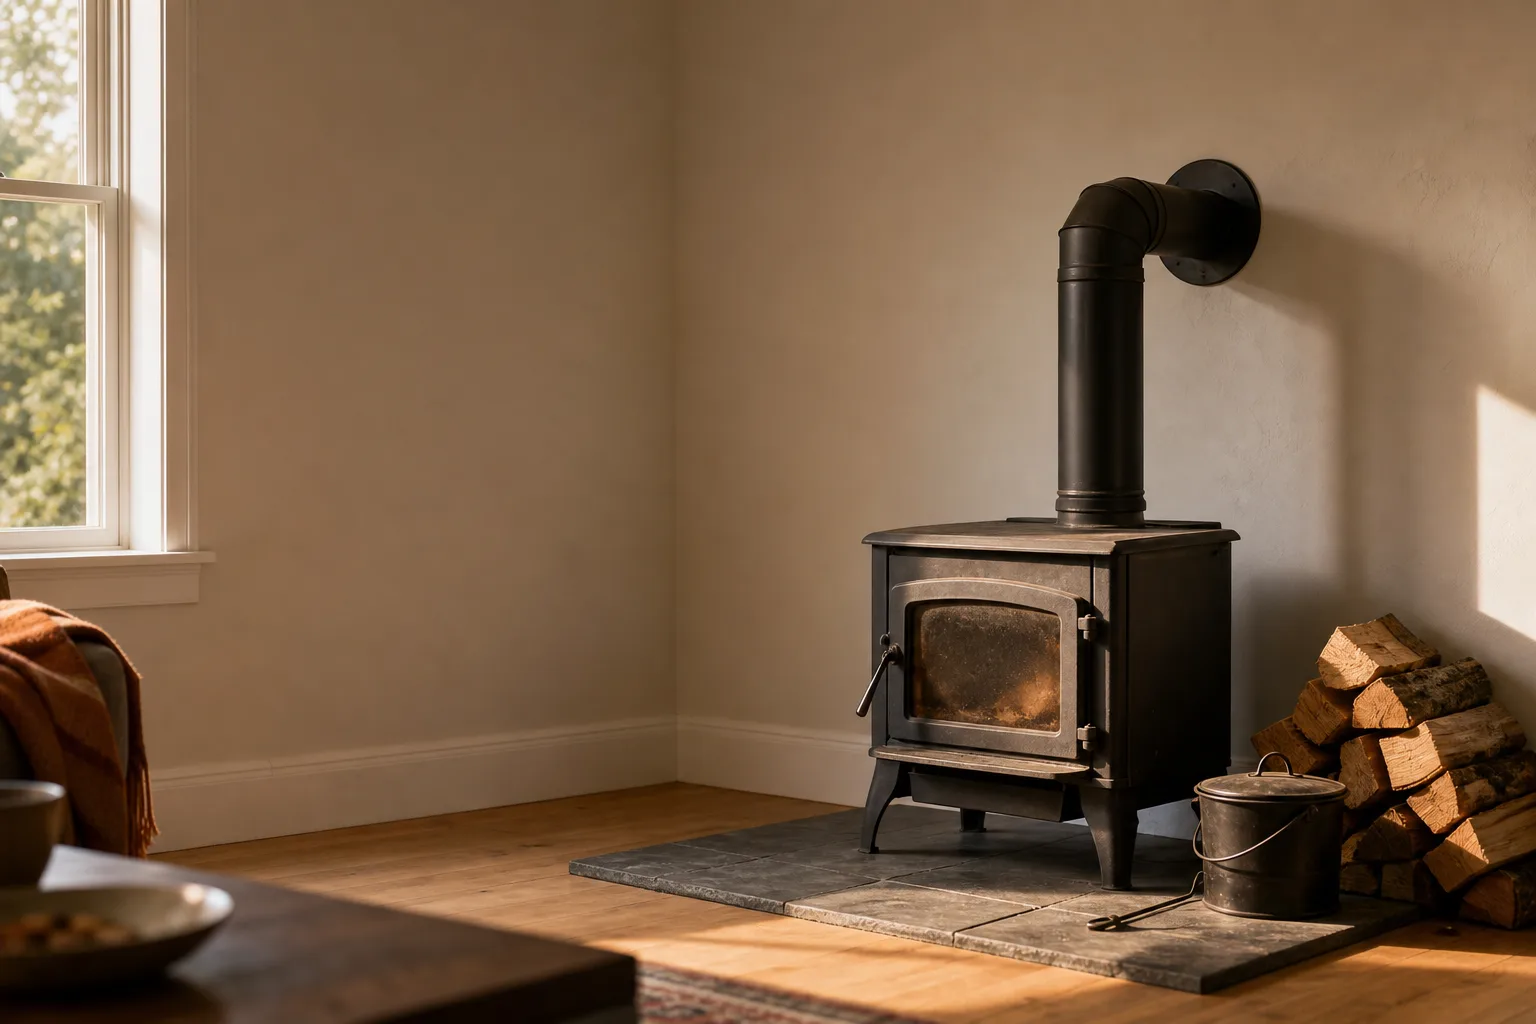
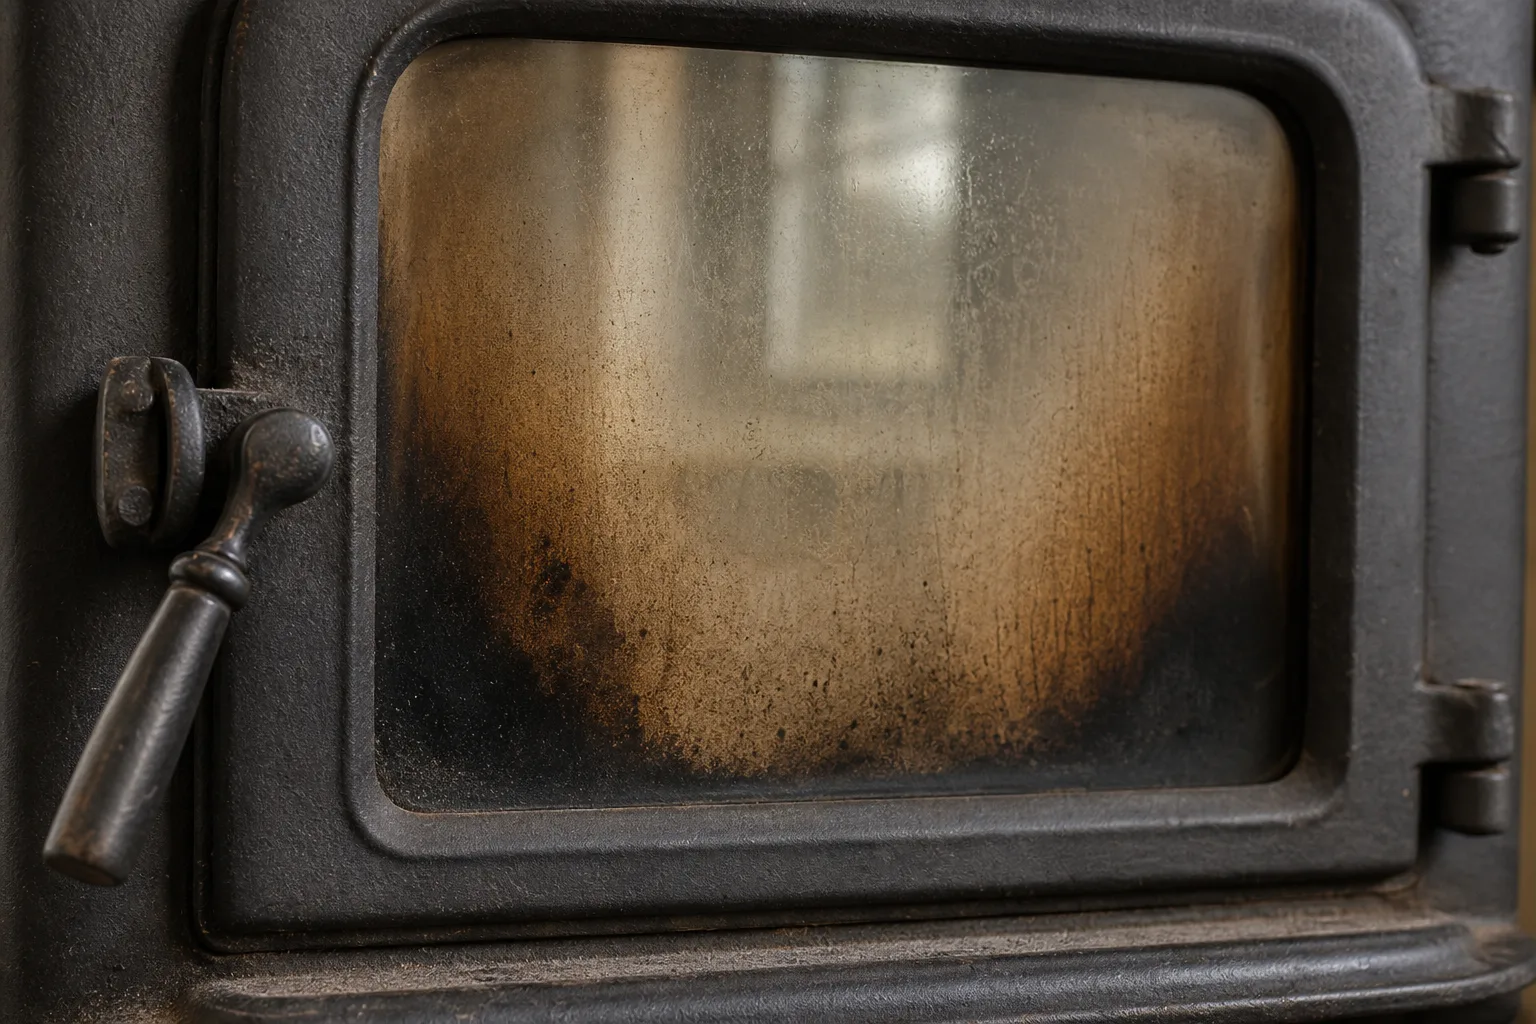
It is the last week of August, and the stove in your living room is doing something it did not do last winter. The glass has gone brown. The door will not stay tight. Smoke curled out into the room the last time you opened it.
So you searched for wood stove repair, which is a service name and not a diagnosis. That gap is the actual problem you are trying to solve.
Here is the honest shape of what follows. Some of what goes wrong with a wood stove is a Saturday morning and a replacement part you can fit yourself. Some of it means do not light the stove again until someone has inspected it.
I am not going to tell you yet which one you are looking at, because you need to know what you are seeing first. That is the order this guide is built in.
Wood stove repair gets easier the moment you stop thinking about the stove as one object and start thinking about it as a small set of parts that sit in direct flame. Those parts are meant to wear out. The body around them usually is not.
Start With What You Are Actually Seeing
Every wood stove repair should start the same way: at the stove, cold, door open, with a flashlight.
The table below is a place to start looking, not a verdict. A symptom points you toward a part to inspect with your own eyes. It does not tell you what is wrong on its own.
| What you are seeing | What to check first | Where to start |
|---|---|---|
| Glass darkening at the bottom corners | The door gasket and the glass gasket seal | Yourself |
| Glass fully black and opaque | Door and glass seals, how dry the wood is, the air control setting | Yourself, then a professional |
| Door will not latch tight | Latch adjustment, hinge wear, the gasket in its channel | Yourself |
| Smoke into the room when you open the door | Draft, and how slowly you are opening it | Yourself, then a professional |
| Smoke into the room while it is burning normally | Stop burning. The chimney and the air supply to the room | Professional |
| A crack across a firebrick | The brick edges, whether any piece has shifted, whether metal shows through | Yourself |
| Baffle sagging, warped, or in pieces | The plate spanning the top of the firebox | Yourself, replace per the manual |
| Air tubes scaled, or holes burned oversized | The drilled steel tubes just under the baffle | Per the manual, professional if unsure |
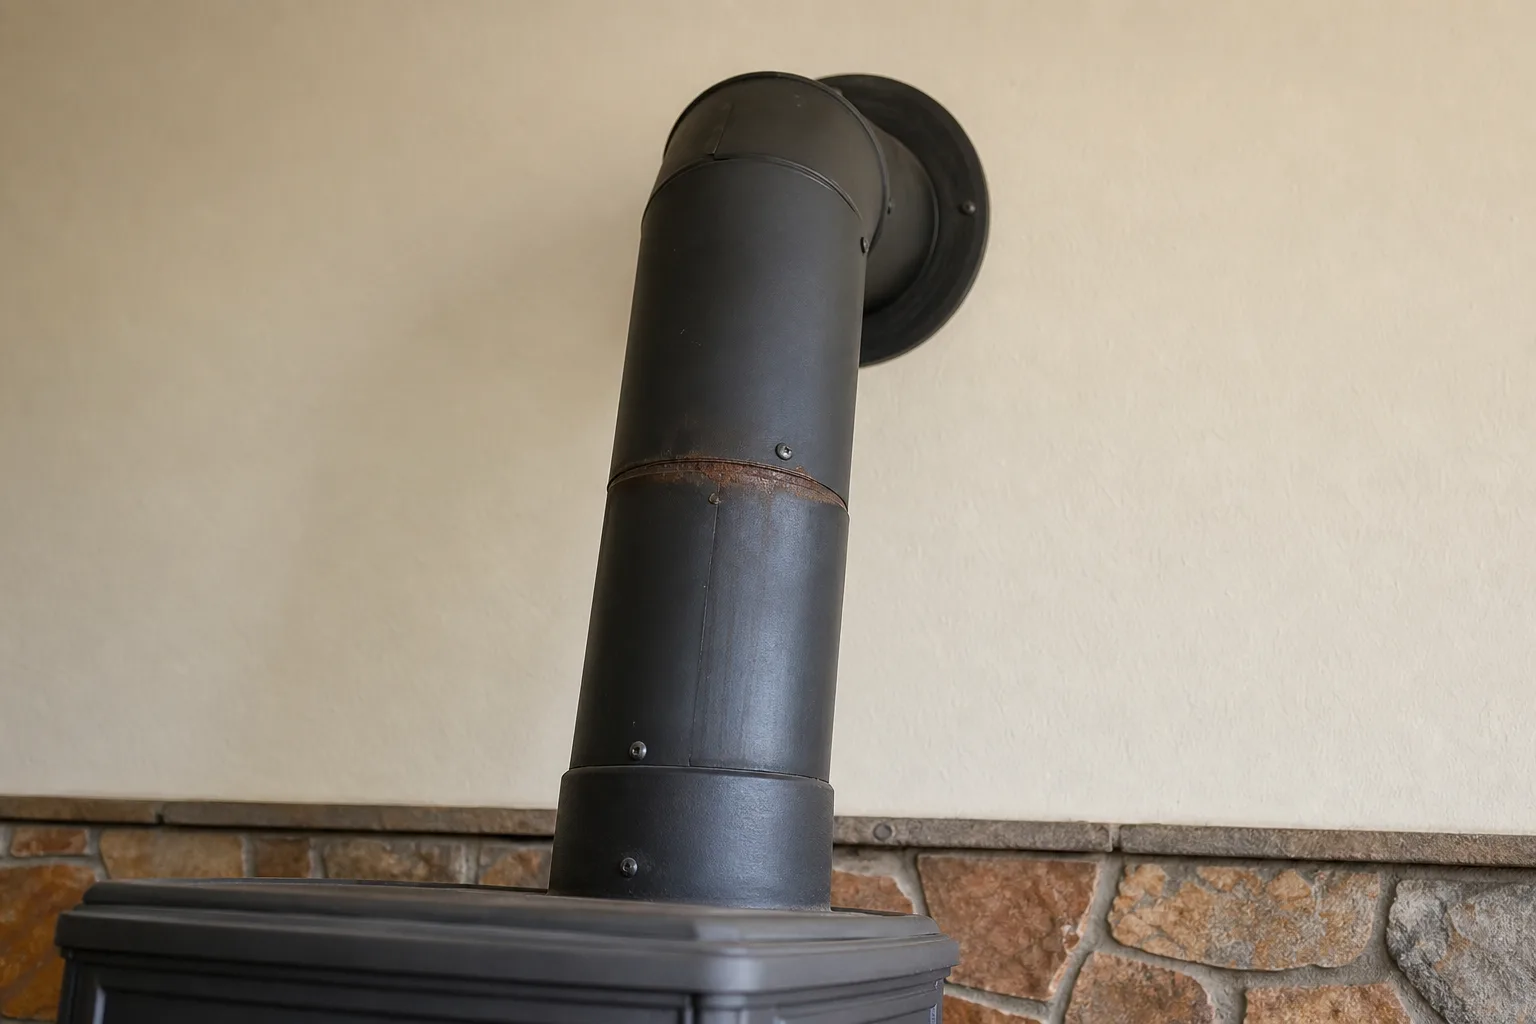
| Stovepipe joint rusted, stained, or pulling apart | Every joint and screw from the stove to the wall | Stop burning. Professional |
| Stove runs hot and will not settle with the air closed | Every seal and every air path into the firebox | Yourself, then a professional |
| Chipped or cracked door glass | The pane and its retaining clips | Yourself, replace per the manual |
Most of that list you can walk through in ten minutes with a flashlight and no tools. Do it before you call anyone. A homeowner who can say "the gasket is flat on the latch side and there is a gap at the top corner" gets a very different conversation than one who says "it is broken."
From the field: when glass hazes, the bottom corners show it before the middle of the pane does. That is the spot to check, and it is easy to miss, because you spend the winter looking through the middle of the glass at the fire and never really looking at the glass itself.
The Parts That Fail in Wood Stove Repair
Five parts sit in or right above the fire. They take heat directly, they are built as consumables, and they are designed to come back out of the stove.
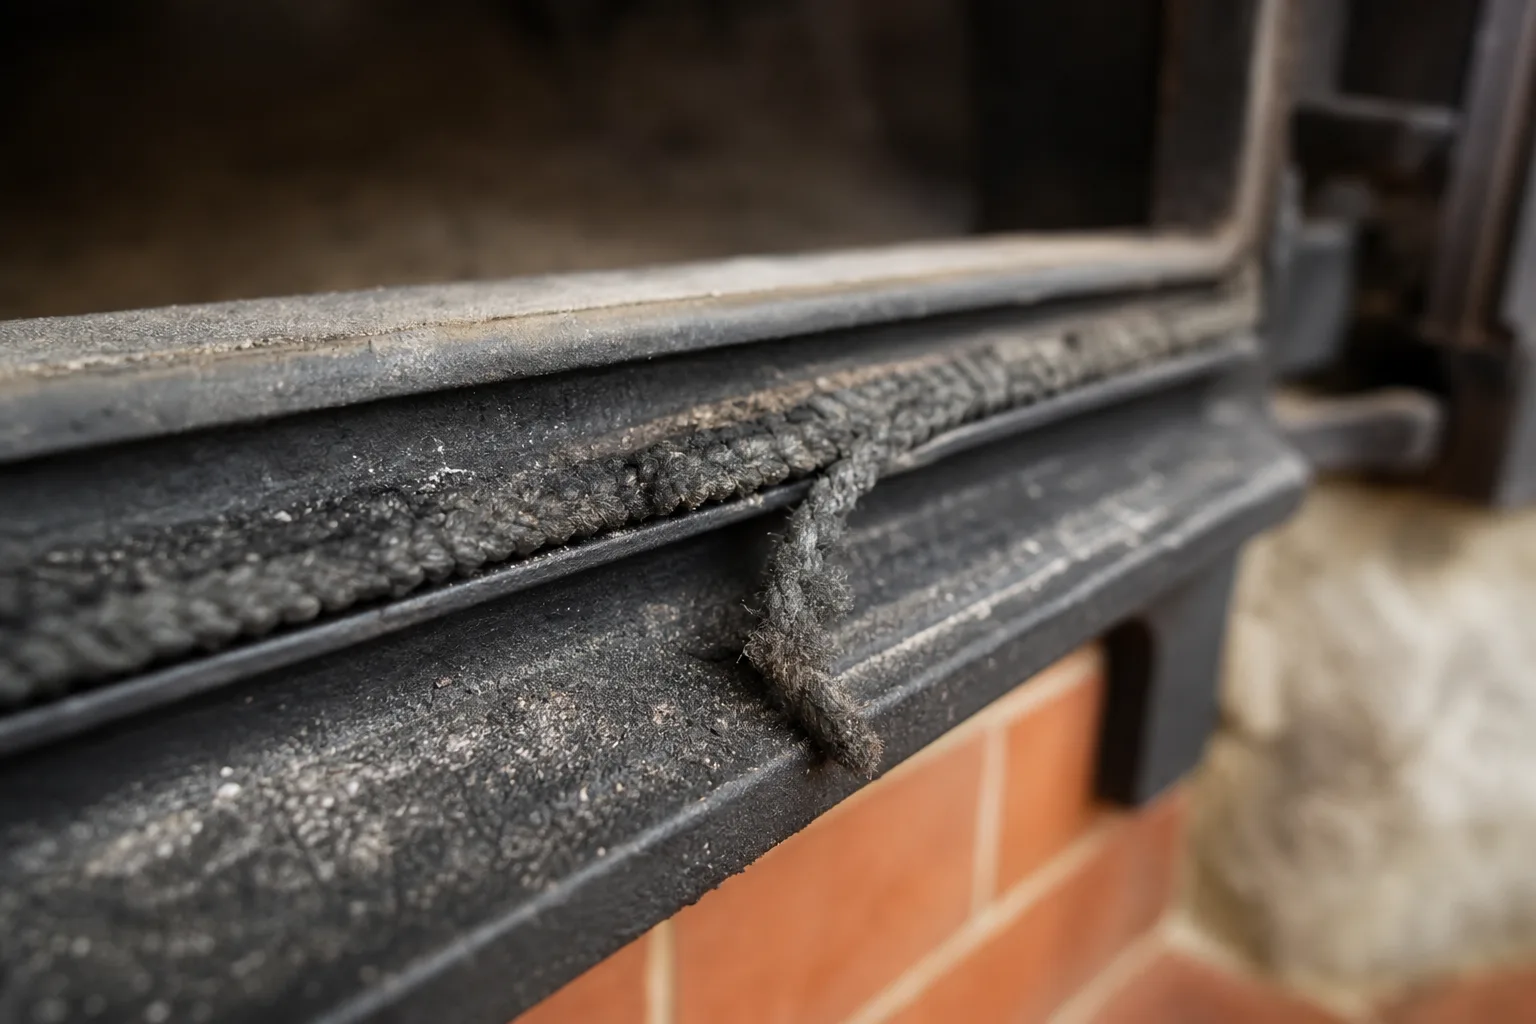
The door gasket
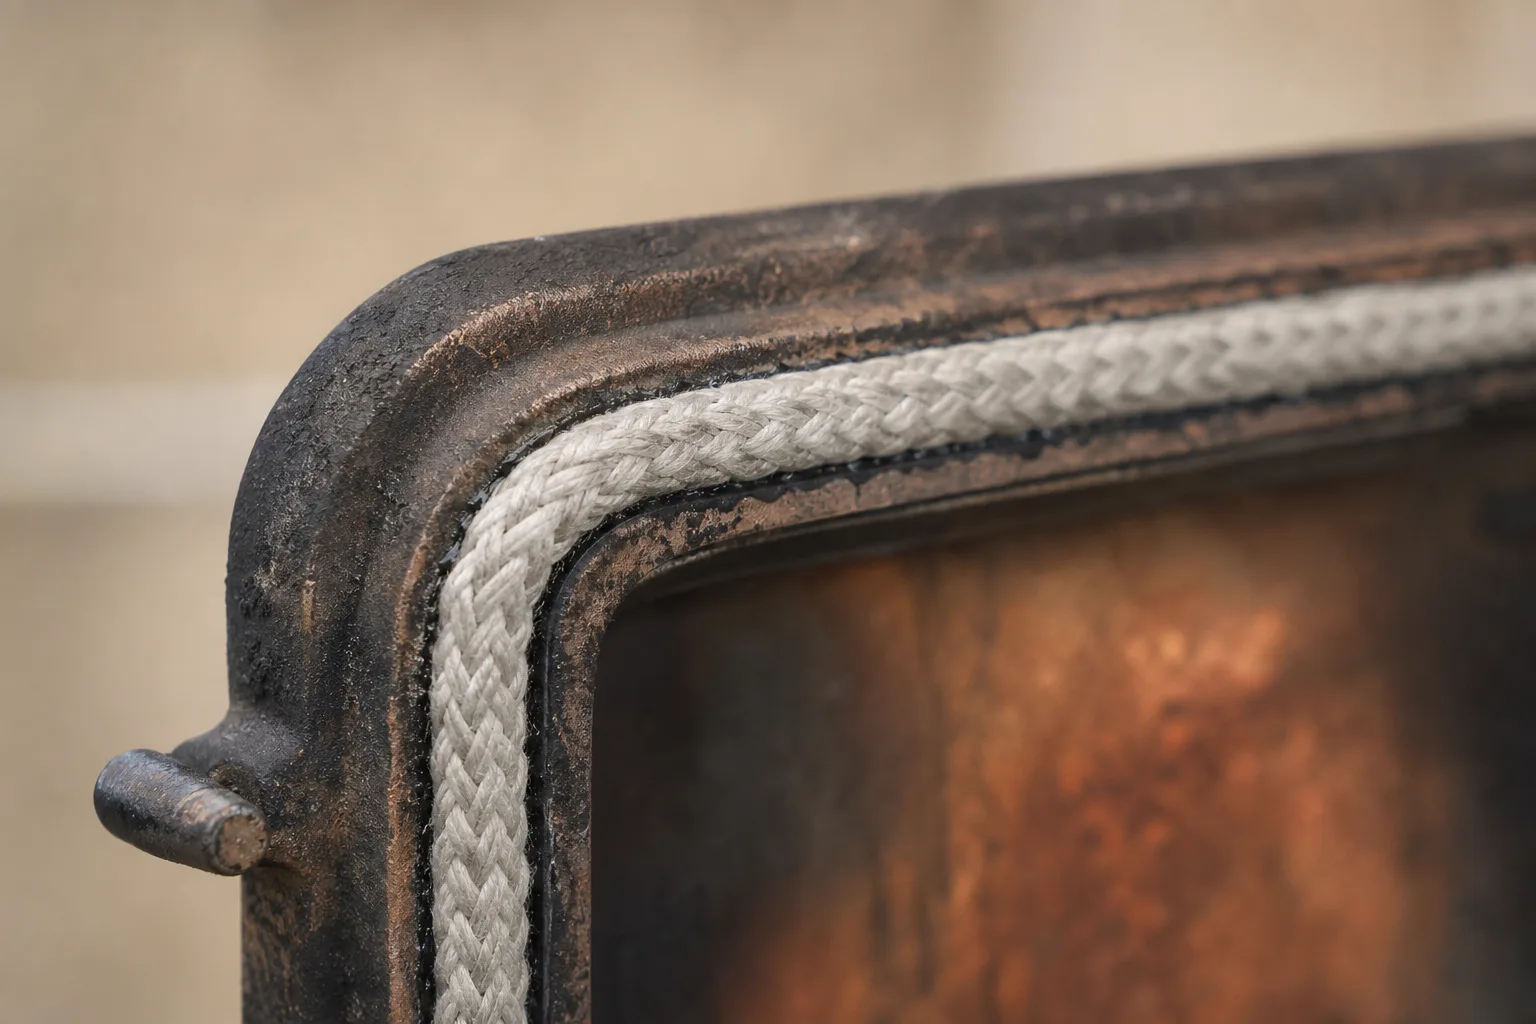
A round braided rope, white or grey when it is new, seated in a channel around the edge of the door. Its whole job is to make the door the only door, so that the air control actually controls the air.
Worn gasket looks like dirty rope. Grey-black, flattened on one side where the door presses, fuzzy where it has frayed, and often hanging out of its channel in a section.
This is a wear part. It is the single most approachable job on the stove, and it is where I would send anyone who wants to start.
Good to know: a darkened gasket is not a failed gasket. Soot and heat discolor the rope long before it stops sealing. The test is whether it still holds, which you can check in about a minute (see below), not what color it has gone.
The door glass
Not ordinary glass. It is a ceramic pane, replaced rather than repaired when it chips or cracks.
Hazed, browned, or opaque glass is a prompt to go inspect, not an answer in itself.
Follow the manual for the pane and its gasket. The retaining clips are usually simple, and the specification is not something to improvise.
Firebrick and the firebox
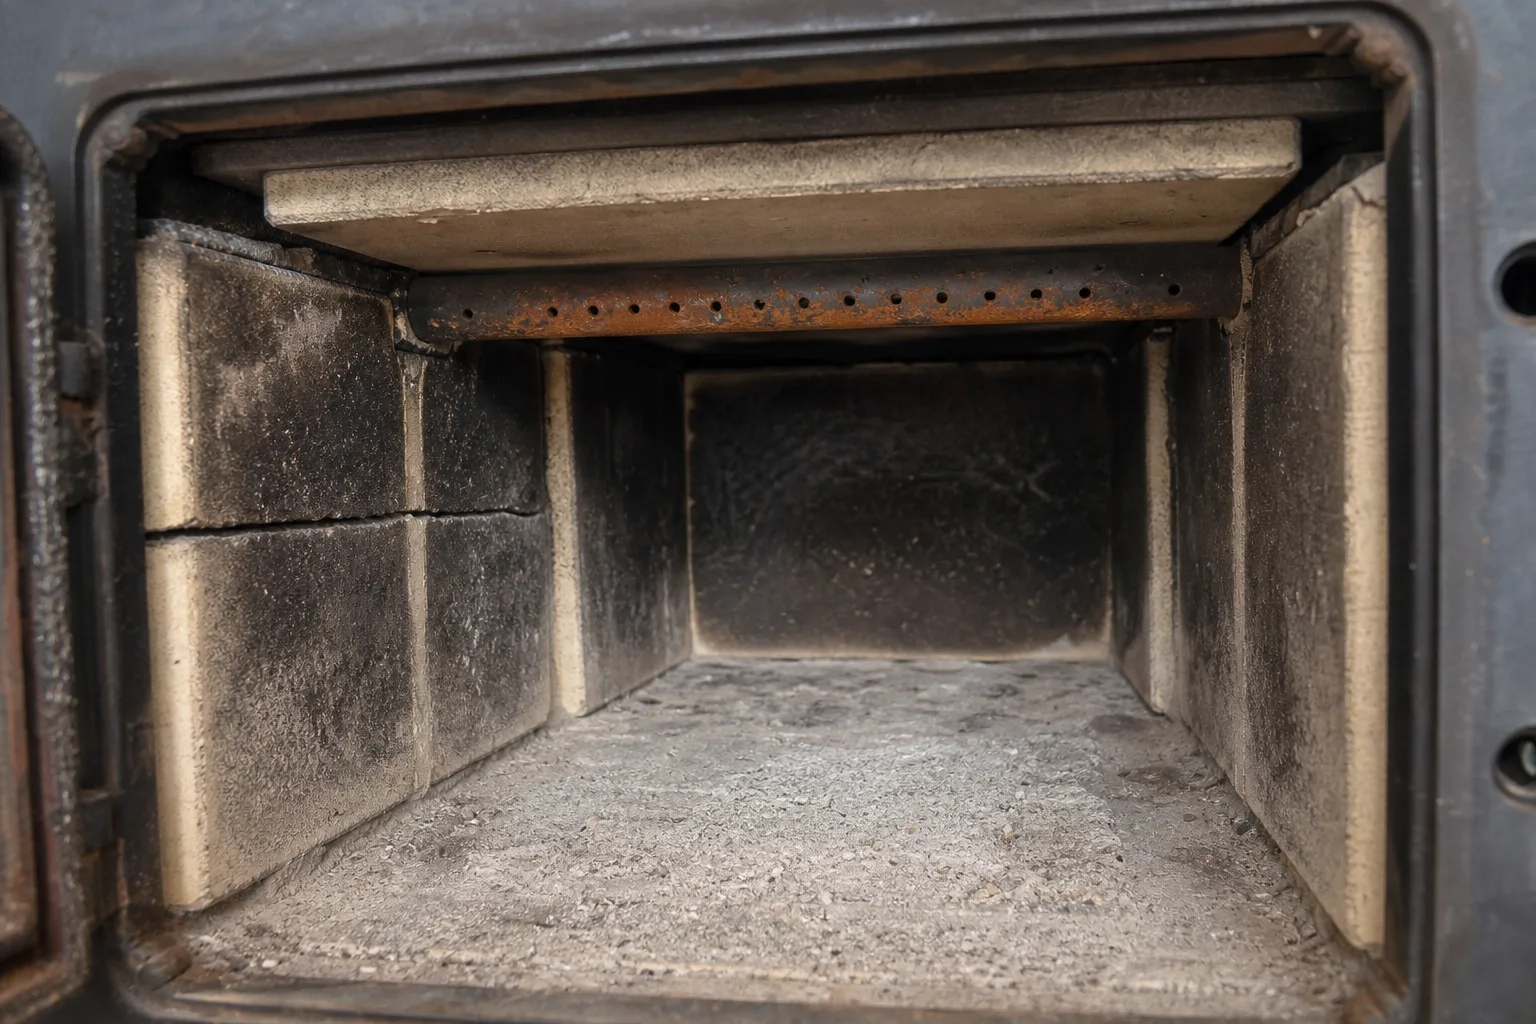
Pale cream or buff-colored bricks lining the floor and walls of the firebox, soot-streaked to grey-black on the fire side, with the original color still showing at the edges. They protect the steel or cast iron body behind them from direct flame.
Hairline cracks are ordinary. Firebrick expands and contracts every time you light a fire, and a tight crack that has not moved is a brick doing its job.
What changes the answer is crumbling at an edge, a piece shifted out of line, or a gap wide enough to show metal behind it. Any of those means the brick is no longer covering what it was put there to cover.
The baffle and the secondary air tubes
Look up. Spanning the top of the firebox is a flat plate, metal or pale refractory board. That is the baffle, and it holds combustion byproducts in the firebox longer instead of letting them go straight up the flue.
Just below it sits a row of steel tubes drilled with small holes, feeding preheated air into the hottest zone so secondary combustion can happen. Keeping that zone hot is the baffle's other job.
Worn baffles sag, warp, or break into pieces. Worn tubes scale over, rust-orange to black, sometimes with holes burned larger than they started. Both are replaceable, and both are worth a look before the first fire.
The catalytic combustor, if your stove has one
Not every wood stove has one, and you should check the manual rather than assume. Where there is a combustor, it is a consumable: it degrades with use and it is meant to be replaced on a schedule the manufacturer sets out, using the signs the manufacturer describes.
If your manual talks about a combustor and you have never replaced or inspected one, that is a conversation worth having with a professional before the season starts.
When to Stop Burning and Get It Inspected
Some symptoms are not a repair plan. They are a stop signal, and the correct response is to leave the stove cold until someone has inspected the system.
Safety note: stop using the stove and have it inspected before the next fire if any of these are true. Smoke or fumes come into the room while the stove is burning normally with the door shut. A stovepipe joint has separated, rusted through, or is showing stains at a seam. There is a crack, hole, or gap that goes through the firebox to the outside. The door will not close and latch. You suspect a chimney fire has occurred, whether or not you saw one.
That last one deserves a sentence. A chimney fire can happen without a dramatic roaring noise, and the evidence for it sits inside the flue, where someone trained to look will find it.
Carbon monoxide has no color and no smell, which is why the alarm is the instrument and your nose is not. Test smoke and carbon monoxide alarms monthly, every month of the year, not only before the burning season starts.
The flue should be professionally cleaned at least once a year, and you should be checking it yourself during the burning season too. Book the chimney cleaning and the inspection in late summer rather than in December.
Good to know: NFPA 211 sets out when a Level 2 inspection is required. At the sale or transfer of the property. On a change to the system, meaning a change of fuel, a change to the shape or material of the flue, or the addition or replacement of an appliance. After a malfunction. After a chimney fire. And after an external event likely to have caused damage to the chimney.
If you recognize your own situation in that list, the next step in your wood stove repair is booking an inspection, not shopping for parts.
Not sure whether yours is on that list?
If your stove is showing any of the stop signals above, the next step is an inspection rather than a guess. Tell us what the stove is doing and we will match you with an independent local company that works on wood stoves.
Ask that company for its license and insurance details and check them yourself. Insist on a written estimate before any work starts, and do not let work begin without one in your hands.
Call (513) 655-6702.
Wood Stove Repair You Can Handle Yourself
Now the other side of the fork. Several of these are genuinely a morning, and doing them yourself is not cutting a corner.
The dollar bill test
This is the one wood stove repair check I would want every stove owner to know, and it takes about a minute.
With the stove completely cold, lay a dollar bill halfway across the door jamb, close the door, latch it, and pull the bill. Real resistance means the gasket is sealing at that point. If it slides out with no grip, it is not.
The part that is easy to skip: do it at several points all the way around the door. Both sides, the top, the bottom, near the latch and near the hinges. A door can seal beautifully at the latch and be wide open at the top corner, which is exactly the failure you cannot see.
Pro tip: run the same test on the glass gasket if your stove has a separate one, and write down where it failed. Handing a professional the phrase "no resistance at the upper hinge corner" is worth more than any description of the smoke.
Reseating or replacing a door gasket
If the rope itself is in good condition and has just come away from its channel, it can be bedded back in with stove gasket cement and cured by running the stove hot afterward.
If it is frayed, brittle, flattened, or missing a section, it gets replaced rather than glued.
Do not guess the rope diameter or the cement type. Both are specified in your model's manual, and this is the wood stove repair where sizing by eye undoes the whole job. A rope too fat holds the door off its seat. A rope too thin never fills the gap.
Swapping a cracked firebrick
In most stoves the bricks sit in place under their own weight, held by simple retainers or by each other, and they come out by hand once the stove is cold and empty.
Myth vs. fact: the myth is that a cracked firebrick has failed. The fact is that a tight crack in a brick that has not moved is ordinary thermal wear. What calls for replacement is a brick crumbling at an edge, a piece that has shifted out of position, or a gap that has opened up enough to expose the metal body behind it.
Replace like for like, following the manual. Firebrick is cut to a size and a thickness for a reason, and a substitute that seems close is not close.
Wood stove repair jobs that need a professional
Here is the honest line, and I would rather lose the phone call than blur it.
Anything above the stove belongs to a professional: the connector pipe run, the chimney, the liner, clearances to combustibles, the hearth. Anything structural in the firebox, including welding, cracks through the body, or a warped door that will not seat.
A catalytic combustor you have never handled. Any change to how the appliance is installed or vented, which is a system change in the sense NFPA 211 means. And any stove bought used without a manual, because model-specific parts and clearances are not something to work out by eye.
Before your first fire of the season, walk this list:
- Door seal. Dollar bill test at six or more points around the door, and again on the glass gasket if your stove has a separate one.
- Glass. Look for chips, cracks, and where the haze sits.
- Firebrick. Check every edge for crumbling, movement, or metal showing through.
- Baffle. Look up. Sag, warp, or breakage.
- Air tubes. Scaling, and holes burned larger than the others.
- Pipe. Every joint and every screw from the stove collar to the wall.
- Alarms. Test every smoke and carbon monoxide alarm in the house.
- Cleaning and inspection. Book both before the first fire.
Smoke and Draft: Two Opposite Faults
Draft is the pull the chimney system produces. NFPA 211 requires that a chimney system produce sufficient draft, measured in inches of water column, to reliably carry combustion products out.
Draft fails in two opposite directions, and from the couch they can look similar.
Not enough draft
Weak draft shows up as back-puffing and smoke coming into the room.
One factor is worth knowing about because it sits outside the stove entirely: a newer, tightly constructed house may not have enough natural openings to supply the stove with combustion air. The stove is fine and the chimney is fine, and the house is the constraint.
Fuel matters here too. Wood that has not dried enough is harder to burn well, and that belongs in the same conversation as draft rather than in a separate one.
Too much draft
The opposite complaint: the fire runs hot, burns through a load fast, and will not settle when you close the air control.
Either air is reaching the fire by some route other than the air control, or the system is pulling harder than the appliance was set up for. Two different checks, and the door seal test above is where the first one starts.
Pro tip: work out which direction your stove is failing in before you change anything. Adding draft to a stove that already has too much, or restricting a stove that is starving, makes the problem worse rather than better. If you cannot tell, that is a fair reason on its own to have someone measure it.
Repair or Replace: The Honest Fork
I would rather say this plainly than pretend every stove is worth saving.
The case for repair rests on something structural. The parts listed above are the ones designed to be consumed and swapped, so a stove with a sound body and an intact firebox is an appliance with replaceable wear items. Replacing wear items is maintenance, not rescue.
Wood stove repair stops being the right answer in three situations.
When the firebox itself has lost integrity, with cracks or holes through the body rather than through the brick lining it. When parts specified for your model cannot be obtained. And when the stove is wrong for the space it heats, which no part can fix, because nothing in a parts catalog changes the size of a firebox.
Notice what is not on that list: age. A number of years is not a diagnosis. The question is whether the body is sound and whether the wear parts can be replaced, and both are things you can find out.
How VIO Helps With Wood Stove Repair
Plainly, so there is no confusion about what we are.
VIO does not own trucks and does not employ sweeps. We are a referral network. When you tell us what your stove is doing, we match you with an independent local company that does wood stove repair in your area, and that company is the one that shows up and does the work.
That distinction changes how you should handle the appointment.
Describe the symptom the way the checklist taught you to, not as "it is broken." Have your make, model, and manual to hand if you can find them. Ask the company we match you with for its license and insurance details, and check those yourself rather than taking anyone's word for it.
Ask when you book whether the visit covers the chimney and connector as well as the appliance. Those are separate parts of the system, and you want the scope settled before anyone arrives.
On money: insist on a written estimate before any work starts, and do not let work begin without one in your hands. That is your protection, and it is reasonable to require it.
So if your stove is doing something it did not do last year, the next move is small. Go look at it cold, with a flashlight, and walk the eight-item list. Wood stove repair starts with information, and a good deal of that information is sitting inside your stove waiting for a flashlight.
Get it looked at before the first fire
Tell us the symptom, the stove, and what you have already checked, and we will connect you with an independent local company in your area that handles wood stove repair.
Ask for license and insurance details, and get the estimate in writing before any work begins.
Call (513) 655-6702.
Symptom checker
What is your chimney doing?
Tap the closest match for an honest first answer.