



On this pageWhat a Wood Stove Chimney Kit Actually Is7 sections+6
- What a Wood Stove Chimney Kit Actually Is
- What's in the Box: The Wood Stove Chimney Kit Component Manifest
- What's Missing From Almost Every Wood Stove Chimney Kit
- Sizing and Routing: The Choices That Decide Which Kit You Buy
- Installing It Yourself, or Not
- How VIO CHIMNEY Helps With Your Wood Stove Chimney Kit
- Choosing Your Wood Stove Chimney Kit With Confidence
Quick answer
A wood stove chimney kit bundles the parts that carry exhaust from your stove through the ceiling or wall and above the roof: adapters, a ceiling support box or wall thimble, an attic insulation shield, roof flashing, a storm collar, and a chimney cap. Pipe passing through a floor, ceiling, or roof must be UL 103 HT listed Class A. Kits cover a standard installation, so additional chimney pipe is often purchased separately.
Buying a wood stove chimney kit feels like the easy part of the project. You picked the stove, you found a box that matches its flue size, and the listing says everything is included. Then you start reading the fine print and the confidence drains out of it.
Here is the thing that makes this purchase strange. There is one line buried in almost every kit description that decides whether the box arriving on your porch is a complete system or half of one. Most people do not notice it until the parts are spread across the garage floor.
I want to give you what no retailer will. A real component list you can hold a listing against, the two or three measurements that actually decide which wood stove chimney kit is right for your house, and an honest read on where doing this yourself stops making sense.
What a Wood Stove Chimney Kit Actually Is
A wood stove chimney kit is a bundled set of parts that takes the exhaust from your stove, carries it through your building envelope, and terminates it safely above the roof. It is not one product. It is a stack of listed components that have to agree with each other.
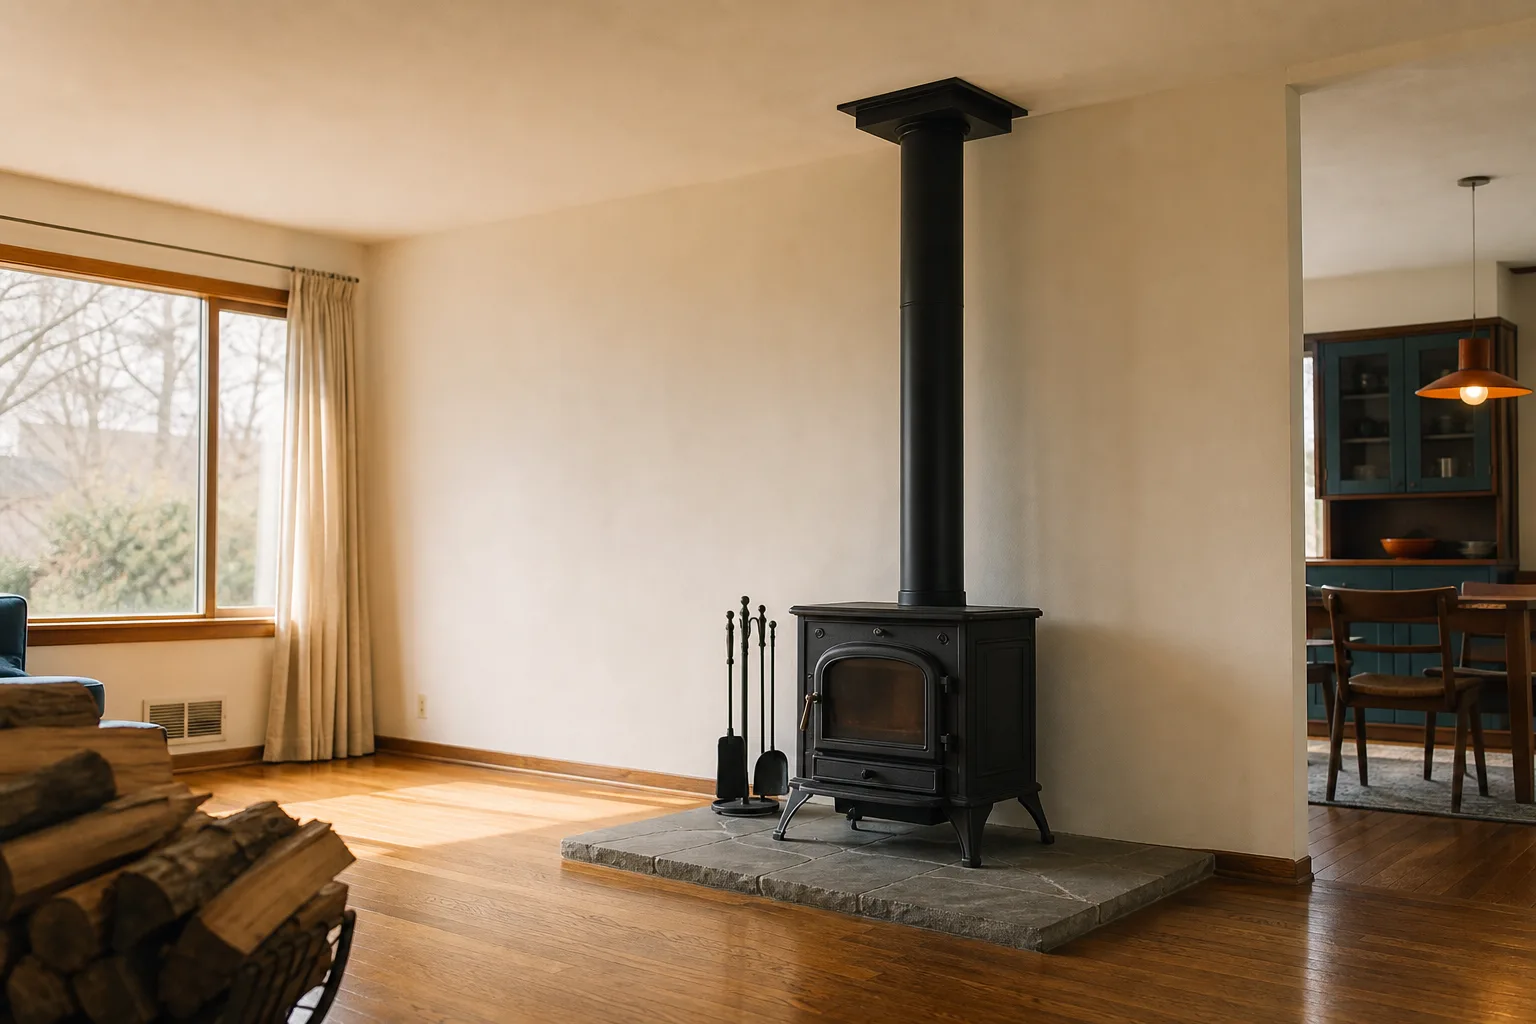
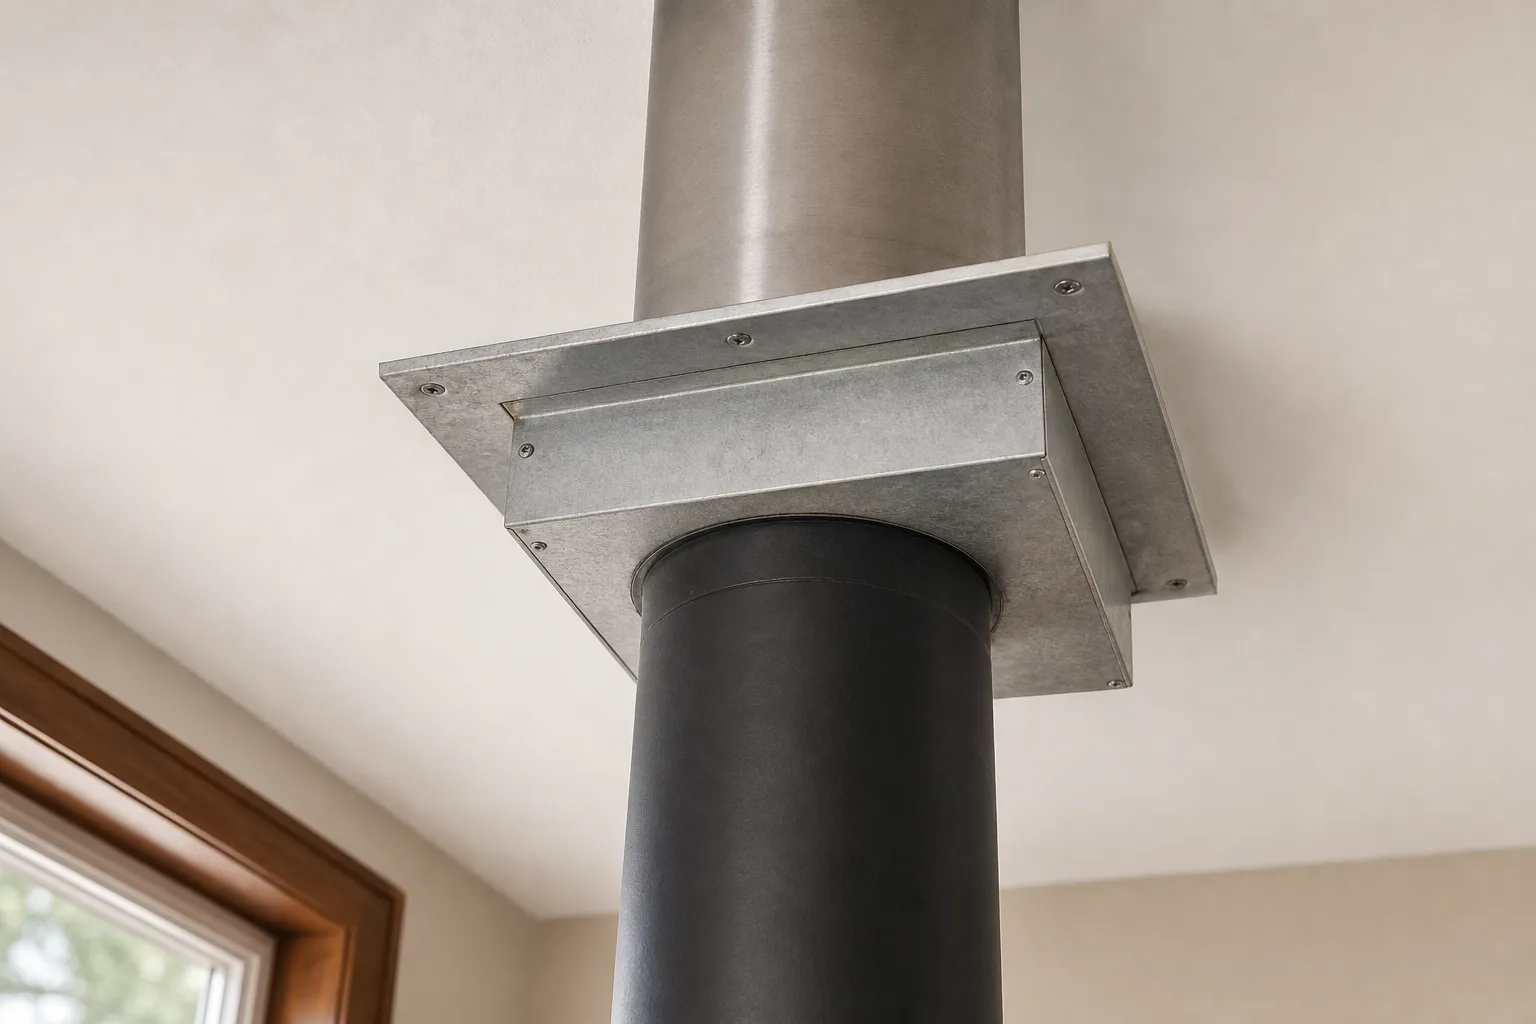
The single most useful thing you can learn about these systems takes five seconds. Black pipe in the room. Silver pipe the moment it enters the ceiling.
That color change is not decorative. It marks the boundary between two entirely different products with two entirely different safety listings.
Connector Pipe vs Class A Chimney Pipe
Connector pipe, which most people call stove pipe, is the matte black steel section that runs from the stove's collar up to the ceiling. It is thin, it is meant to be seen, and it radiates heat into the room on purpose.
Class A chimney pipe is the insulated stainless section that does everything above that point. Brushed silver-grey, double-wall, joined in roughly three-foot lengths with a twist-lock band at every seam.
Connector pipe cannot pass through a ceiling, a floor, or a roof. Ever. That job belongs to Class A only, and no amount of extra clearance changes it.
Myth vs. fact: People assume Class A pipe and stove pipe are the same product sold in two colors. They are not. They carry different listings, different wall construction, and different clearance requirements. Using one where the other belongs is not a shortcut, it is an install that will not pass inspection.
What UL 103 HT Listing Means
Any chimney pipe passing through a floor, ceiling, or roof has to be UL 103 HT listed. That listing is what "Class A" means when the fuel is wood.
The HT stands for high temperature. The listing is tested to 2,100 degrees Fahrenheit, which is not the temperature of a normal fire. It is the temperature of a chimney fire, which is exactly the event the pipe exists to survive.
UL 103 HT pipe listed for wood burning carries a minimum two inch clearance to combustibles. That two inches is a listing requirement, not a suggestion, and it is why the support box and the insulation shield in your kit exist at all.
What's in the Box: The Wood Stove Chimney Kit Component Manifest
Kit contents vary by manufacturer and by route, but the shapes are consistent enough to check against. Below are two verified examples, listed exactly as the manufacturers publish them.
The Through-the-Ceiling Kit
A basic 6 inch through-the-ceiling kit typically ships with a stove-collar adapter, a snap-lock adapter, an 11 inch square ceiling support box with trim, adjustable flashing rated for a 0/12 to 6/12 roof pitch, a chimney cap, a storm collar, and an attic insulation shield.
Flat-ceiling kits carry a similar spread, plus a 40 to 68 inch adjustable black connector pipe, the flat ceiling support box, the insulation shield, 0 to 6/12 roof flashing for standard shingled roofs, a storm collar, and a cap.
Read that list again and notice what each piece physically does:
- Adapters connect the stove's collar to the connector pipe, and the connector pipe to the Class A system.
- Ceiling support box is the square metal box set into the ceiling. It holds the weight of the chimney above it and keeps framing away from the pipe.
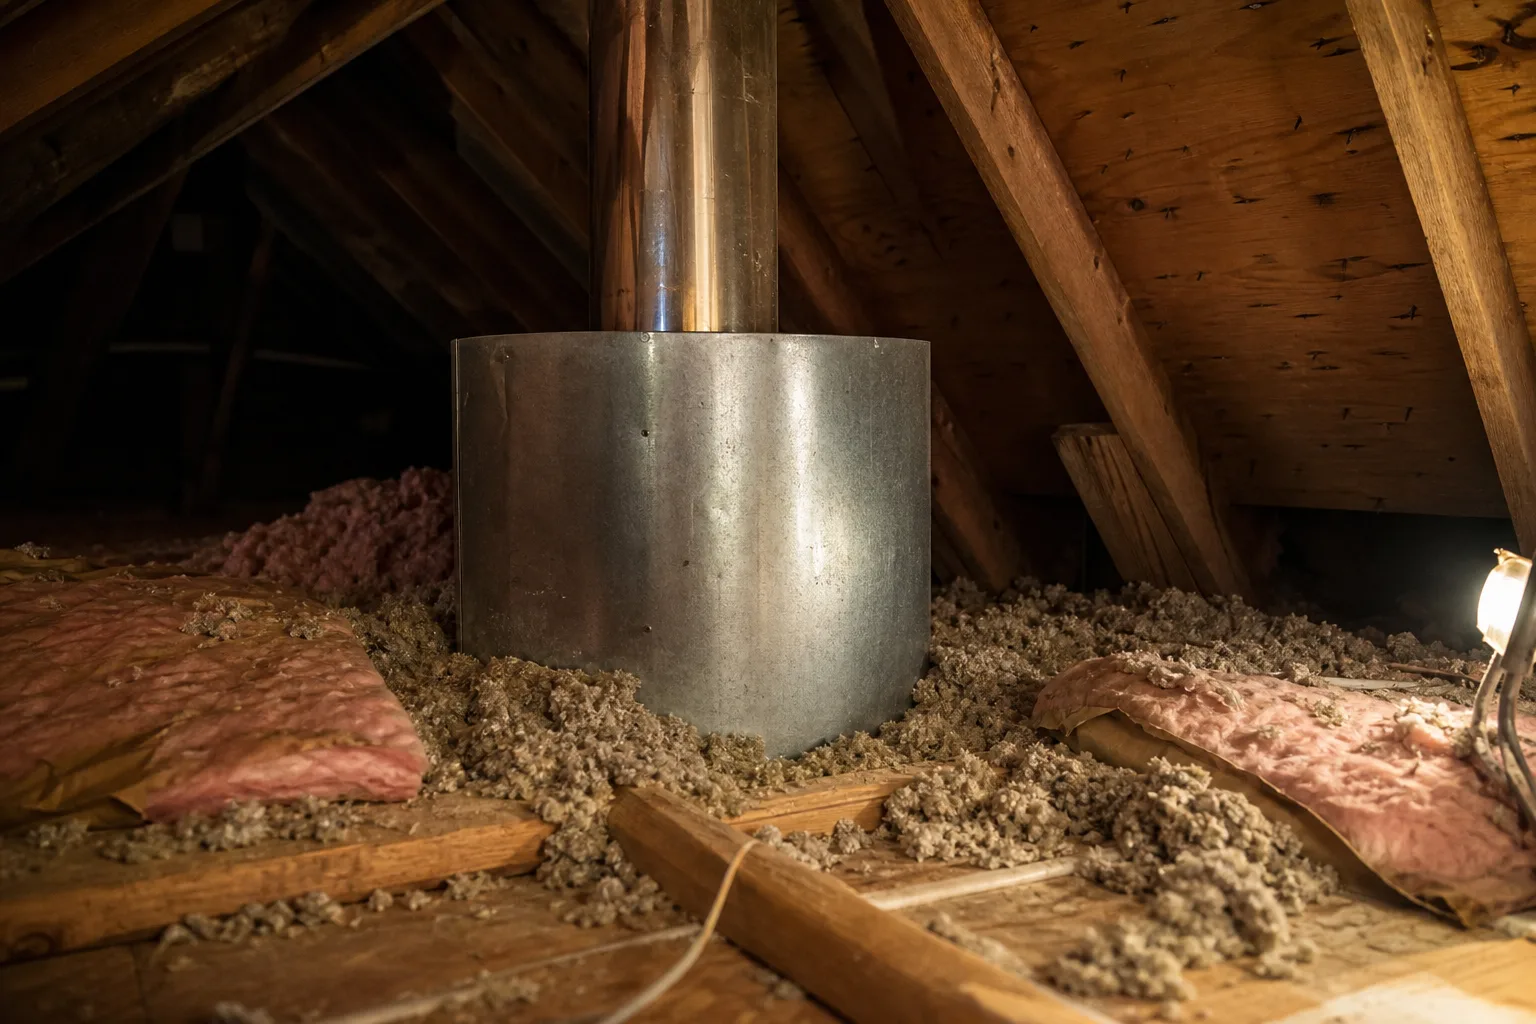
- Attic insulation shield is the bare galvanized cylinder standing in the attic, pushing insulation back from the pipe. Most people have never seen one until they climb up there.
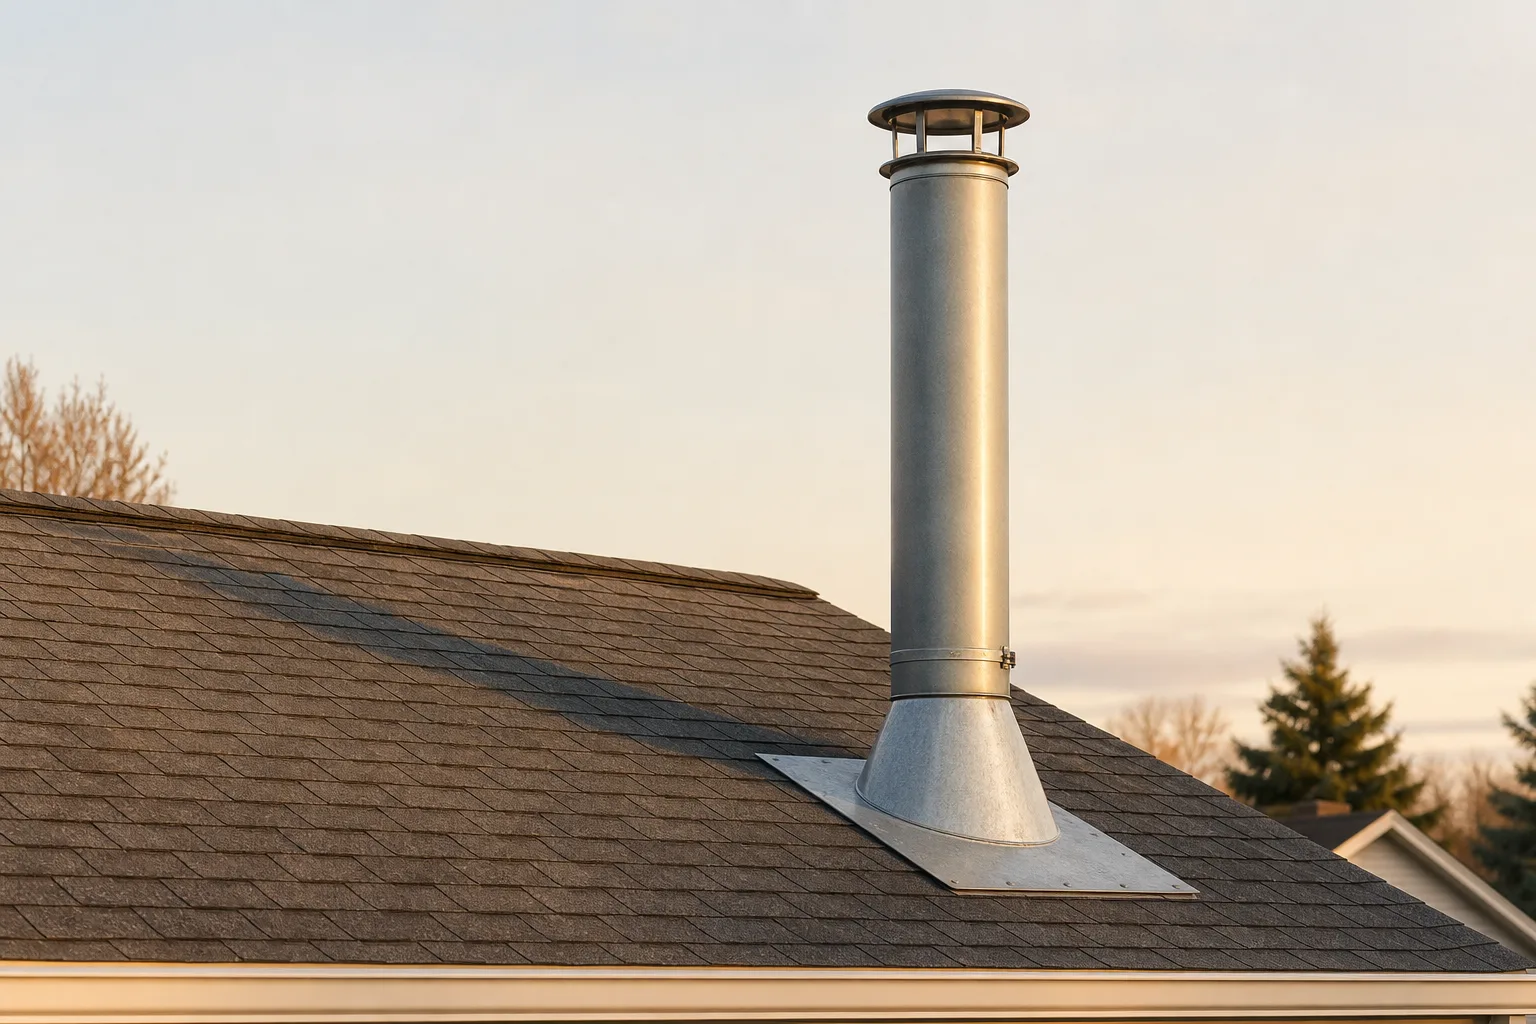
- Roof flashing is the wide flat plate that lies on the shingles with a cone rising around the pipe. It goes under the shingles upslope, over them downslope.
- Storm collar is the thin band clamped around the pipe an inch or two above the flashing cone, sealed at its top edge. Small part, and the first thing to fail if the sealant is skipped.
- Chimney cap sits on legs above the pipe top, keeping rain and animals out, and usually carries a chimney spark arrestor screen in the gap beneath it.
The Through-the-Wall Kit
A wall-exit kit is a different animal. A through-the-wall kit typically includes a wall thimble, a horizontal chimney pipe section, a tee with a clean-out cap, a tee support, two wall straps, and a chimney cap.
The tee is the visible difference. It sits at the bottom of the exterior vertical run with a removable round cap on its underside, so ash and debris have somewhere to collect and somewhere to be removed from.
Good to know: The screen in that cap catches embers on the way out, and because it is a mesh sitting in the exhaust path, it can collect creosote flakes over time. A blocked cap screen can produce a smoky room on a chimney that is otherwise sound, so it is worth checking before assuming something larger is wrong.
Component checklist. Before you click buy on any wood stove chimney kit, confirm the listing names every one of these:
- Adapter matched to your stove's flue collar size
- Connector pipe, or a plan to buy it separately
- Ceiling support box, or a cathedral ceiling support for a vaulted install
- Attic insulation shield, if the pipe passes an insulated attic
- Roof flashing rated for YOUR roof pitch
- Storm collar
- Chimney cap
- Enough Class A pipe to satisfy the height rule, which is the one nobody counts
- Wall thimble, tee, tee cap, tee support, and wall straps on a wall exit
What's Missing From Almost Every Wood Stove Chimney Kit
Here is the line I promised you in the opening. Manufacturers state it themselves, in their own listings, in language most shoppers read straight past: kits include the components for a standard installation, and additional chimney pipe may need to be purchased separately to complete the system.
That sentence reframes the entire purchase. The kit is a starting point, not a bill of materials for your house.
Nobody's house is a standard installation until you measure it and find out.
The items that most commonly fall outside the box:
Extra Class A pipe. Kits ship with a nominal amount. The height rule above your roof often demands more, and a taller ridge or a nearby dormer demands more still.
Connector pipe. Some kits include an adjustable black section. Plenty do not, and the length you need depends on your ceiling height and where the stove's collar exits.
Floor protection. The hearth pad or floor shield under and around the stove is an appliance requirement, not a chimney requirement, so chimney kits do not carry it.
Sealant and fasteners. High temperature sealant at the storm collar and roofing sealant at the flashing are consumables. So are the screws at each connector joint.
Anything your roof does that the flashing does not cover. Kit flashing is commonly rated 0/12 to 6/12. A steeper pitch means a different flashing, bought separately.
Bracing. A tall run above the roof line needs support, and the guy wire kit or roof brace that provides it is its own purchase.
None of that is a manufacturer being sneaky. A kit is assembled to a common case, and a common case has to assume something about your ceiling height and your roof. It cannot assume correctly for every house at once, so it assumes a modest one and leaves you to add. Knowing the names of the individual chimney parts is what lets you read a listing and see the holes.
This is also the place where the budget conversation quietly happens. The box price is one line. The finished number includes the parts above, the hearth pad, the permit if your jurisdiction wants one, and labor if you are not doing it yourself, which is why wood stove installation cost rarely resembles the kit price on the shelf.
Pro tip: Measure the full run first, then buy the kit. Ordering the box because the price looks complete, and only then discovering you are short on pipe, is an easy sequence to fall into. Measure floor to ceiling, ceiling to roof deck, and roof deck to the required termination height. Add them up. Then shop.
Picture yourself in the attic with a flashlight, standing where the pipe will come through, looking at the insulation you now have to hold back with a shield you have not bought yet. That moment is where the "complete kit" idea usually dies. It is also where the job stops being about a purchase and starts being about a plan.
Sizing and Routing: The Choices That Decide Which Kit You Buy
Four things determine which wood stove chimney kit is correct for you. Flue size, exit route, roof pitch, and required height. Get all four right and the kit fits. Get one wrong and you are returning parts.
Matching the Kit to Your Stove's Flue Collar
Most wood-burning appliances use a 6 inch or an 8 inch flue system. Your stove's outlet collar tells you which, and it is not a preference.
Going smaller than the appliance calls for chokes the draft. Going larger cools the exhaust on its way up, which is how creosote gets its start. Match the collar, full stop.
Small-space installs are their own category. Vans, cabins on trailers, and tiny homes run 3, 4, and 5 inch systems, sometimes with detachable sections built for travel. If that is your project, you are shopping in a different aisle than a house install.
Roof Exit or Wall Exit
A roof exit runs the pipe straight up through the ceiling, the attic, and out the roof. It gives you a vertical run with no elbows, which is the best case for draft.
A wall exit goes horizontally through the wall, then turns and climbs the outside of the building. It suits garages, cabins, and single-story homes, and it keeps the work out of your attic and off your finished ceiling.
The tradeoff is real in both directions. Roof exits draft better and involve cutting your roof. Wall exits avoid the roof penetration and give you an exterior chimney that runs colder, plus a tee to clean out.
The 3-2-10 Rule and How Much Pipe Your Wood Stove Chimney Kit Really Needs
This is the measurement that blows up budgets, so take it slowly.
Under NFPA 211, mirrored in the residential code, your chimney has to extend at least 3 feet above the highest point where it passes through the roof, and at least 2 feet above any part of the building, structure, or obstruction within a 10 foot horizontal radius.
Those are two separate tests and you have to satisfy both. A pipe coming through low on a slope can clear the roof by 3 feet and still be short, because the ridge 8 feet away is taller than it is.
Run the numbers before you shop. Find your penetration point, measure up 3 feet, then look around a 10 foot radius for anything taller and measure 2 feet above that. The bigger of the two answers is your termination height, and everything below it is pipe you have to own.
| Kit type | Where it fits | What comes with it | The catch |
|---|---|---|---|
| Through-the-ceiling, flat ceiling | Standard framed ceiling with attic above | Flat ceiling support box, insulation shield, flashing, storm collar, cap | Extra Class A pipe is often needed to reach termination height |
| Through-the-ceiling, cathedral | Vaulted or exposed-beam ceiling | Cathedral ceiling support in place of a box | Support hardware differs; a flat-ceiling kit will not adapt |
| Through-the-wall | Garages, cabins, single-story, finished ceilings you will not cut | Thimble, horizontal section, tee, tee cap, tee support, wall straps, cap | Exterior run stays colder, and you buy vertical pipe by the foot |
| Masonry chimney reline | Existing brick chimney you want the stove to vent into | Not a kit purchase; a listed liner system | Different product entirely, sized and specified to the flue |
Safety note: Clearances are not one number. Single-wall connector pipe requires 18 inches to combustible walls, ceilings, and framing under NFPA 211. Class A pipe listed for wood carries a minimum 2 inch clearance per its listing. Double-wall connector pipe is listed to a reduced clearance, but the figure belongs to that specific product, so read its listing rather than trusting a number you read on a forum. Where your appliance's own instructions are stricter, the appliance wins.
Not sure the kit you picked fits your roof?
Tell us the stove, the ceiling height, and the roof pitch. VIO CHIMNEY matches you with an independent local chimney company, and you can ask them what your run actually needs before you spend a dollar on parts.
Get matched with a local pro: (513) 655-6702
Installing It Yourself, or Not
I am not going to tell you that installing a wood stove chimney kit is beyond a competent homeowner, because for some houses it plainly is not. I will tell you where the line usually sits.
What a DIY Install Realistically Involves
The part inside the room is the friendly part. Setting the stove, running black connector pipe, keeping 18 inches off combustibles, screwing the joints. It is careful work, and it is visible work, which means mistakes announce themselves.
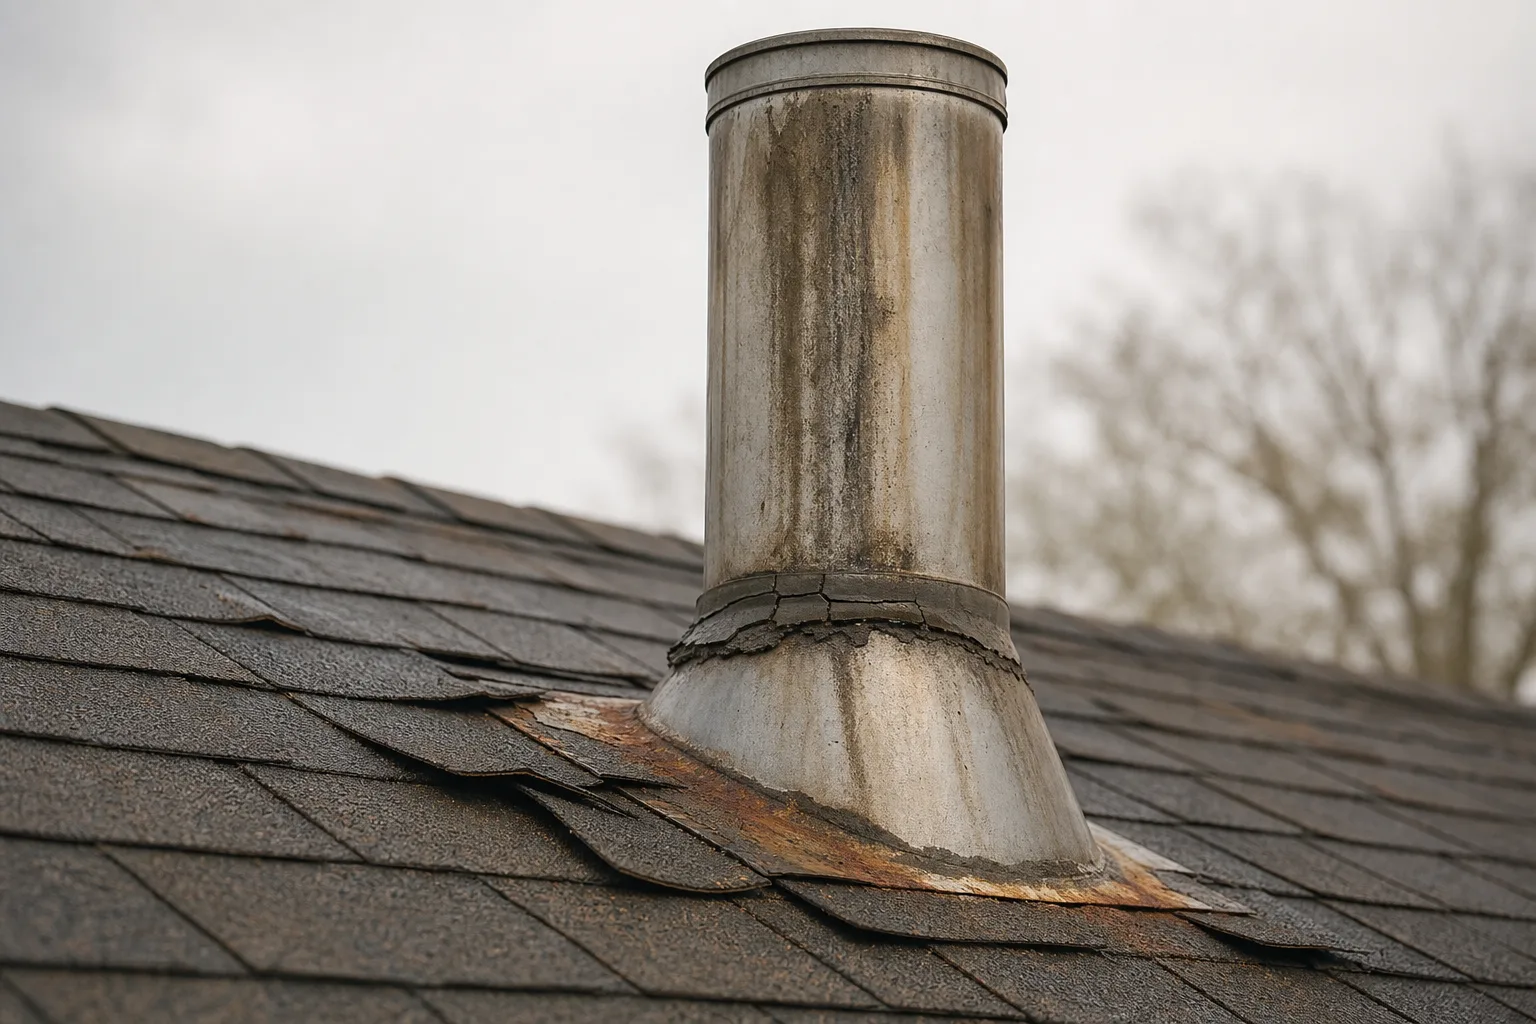
Above the ceiling is where the job changes character. You are cutting framing and building a support box into it, standing in an attic fitting an insulation shield, then going onto a roof to cut a hole in it and make that hole permanently watertight.
Three questions sort most people:
- Is your roof pitch inside the flashing range your kit ships with, and are you comfortable working on it?
- Does your 3-2-10 measurement leave you with an unbraced pipe height that needs guy wires or a roof brace?
- Are you touching an existing masonry chimney? If so, you are not buying a kit at all, you are specifying a listed liner, and that is a different purchase with different rules.
A yes to the first and a no to the rest, on a low-slope ranch roof, is the profile of a DIY install that goes fine. Two stories, a steep pitch, and a long unsupported run above the ridge is the profile of a call.
There is a middle path most people never consider. Do the interior work yourself, the stove, the hearth pad, the connector pipe, and hire out the ceiling penetration and the roof. That splits the job at exactly the seam where the risk changes, and it is usually the cheapest honest version of this project.
One more thing worth knowing before you start. A poor install rarely fails loudly. It draws a little poorly, it stains a little, and the problem can be well underway before it looks like a problem, which is how a stove ends up needing wood stove repair that traces back to the day it went in.
From the field: The part of this job people underestimate is not the stove and not the pipe. It is the roof penetration. A chimney that drafts beautifully and leaks around the flashing is a familiar outcome of a first install, because the pipe work looks finished from inside the house and the flashing detail does not announce its failure until a hard rain.
Permits, Inspection, and Your Insurer
A building permit may be required for a stove and its chimney, and these installations often require inspection. This is genuinely local. Two counties an hour apart can treat it differently, so the answer comes from your building department and nowhere else.
Insurance is worth a phone call before, not after. Some insurers ask for documentation on a solid fuel appliance: proof of professional installation, manufacturer specifications and certifications, permit paperwork, inspection certificates, maintenance records. Some policies now ask whether the appliance meets current EPA certification.
I want to be careful here, because this gets exaggerated online. A DIY install does not automatically void a policy. What can happen is that a claim runs into questions you have no paperwork to answer, and that is a bad afternoon.
There is also a standard worth knowing by name. NFPA 211 requires a Level 2 inspection at the sale or transfer of a property, when the system changes, when there is a malfunction, after a chimney fire, and after an external event such as a building fire, an earthquake, or severe weather. Adding a wood stove to an existing chimney is a system change. That is not optional advice, it is what the standard says.
Once the system is in, the ongoing work is ordinary. Keep the cap and screen clear, and get the flue swept on a schedule. Regular chimney maintenance is what keeps a correctly installed system correct.
Fuel matters more than most new stove owners expect. Wet wood is the single fastest way to load a new flue with creosote, so seasoned firewood is not a refinement, it is part of keeping the chimney you just paid for.
How VIO CHIMNEY Helps With Your Wood Stove Chimney Kit
Let me be plain about what we are, because the industry is full of vague language on this point.
VIO CHIMNEY is a referral service. We do not install chimneys and we do not sell kits. We match homeowners with independent local chimney companies, and those companies do the work.
For your situation specifically, that is useful in one narrow, valuable way. Before you buy, you can have an installer look at your stove, your ceiling, and your roof and tell you what your run actually needs. Whether the kit you found covers it, how much additional Class A pipe your height rule demands, and whether your pitch is inside the flashing range.
If you decide to hand the whole job over, the same match works. If you decide to install it yourself and just want the roof penetration handled by a chimney company, that is a real option too, and a sensible one.
On money: we ask every company in the network to put its estimate in writing before any work starts, and you should insist on exactly that. A written scope is how you compare two companies honestly, and how you avoid an argument later about what was included.
Good to know: Before you book anyone, ask four questions. Which components are in your price and which am I buying? Are you pulling the permit or am I? What clearance are you working to on the connector pipe, and to which listing? And will the estimate be in writing before you start? How a company answers those four tells you a great deal about how it works.
Choosing Your Wood Stove Chimney Kit With Confidence
Take three measurements this week, before any box ships.
Your stove's flue collar diameter. Your floor-to-ceiling height plus the distance from ceiling to roof deck. And your termination height, worked out from the 3 foot rule and the 2 foot rule together, whichever comes out taller.
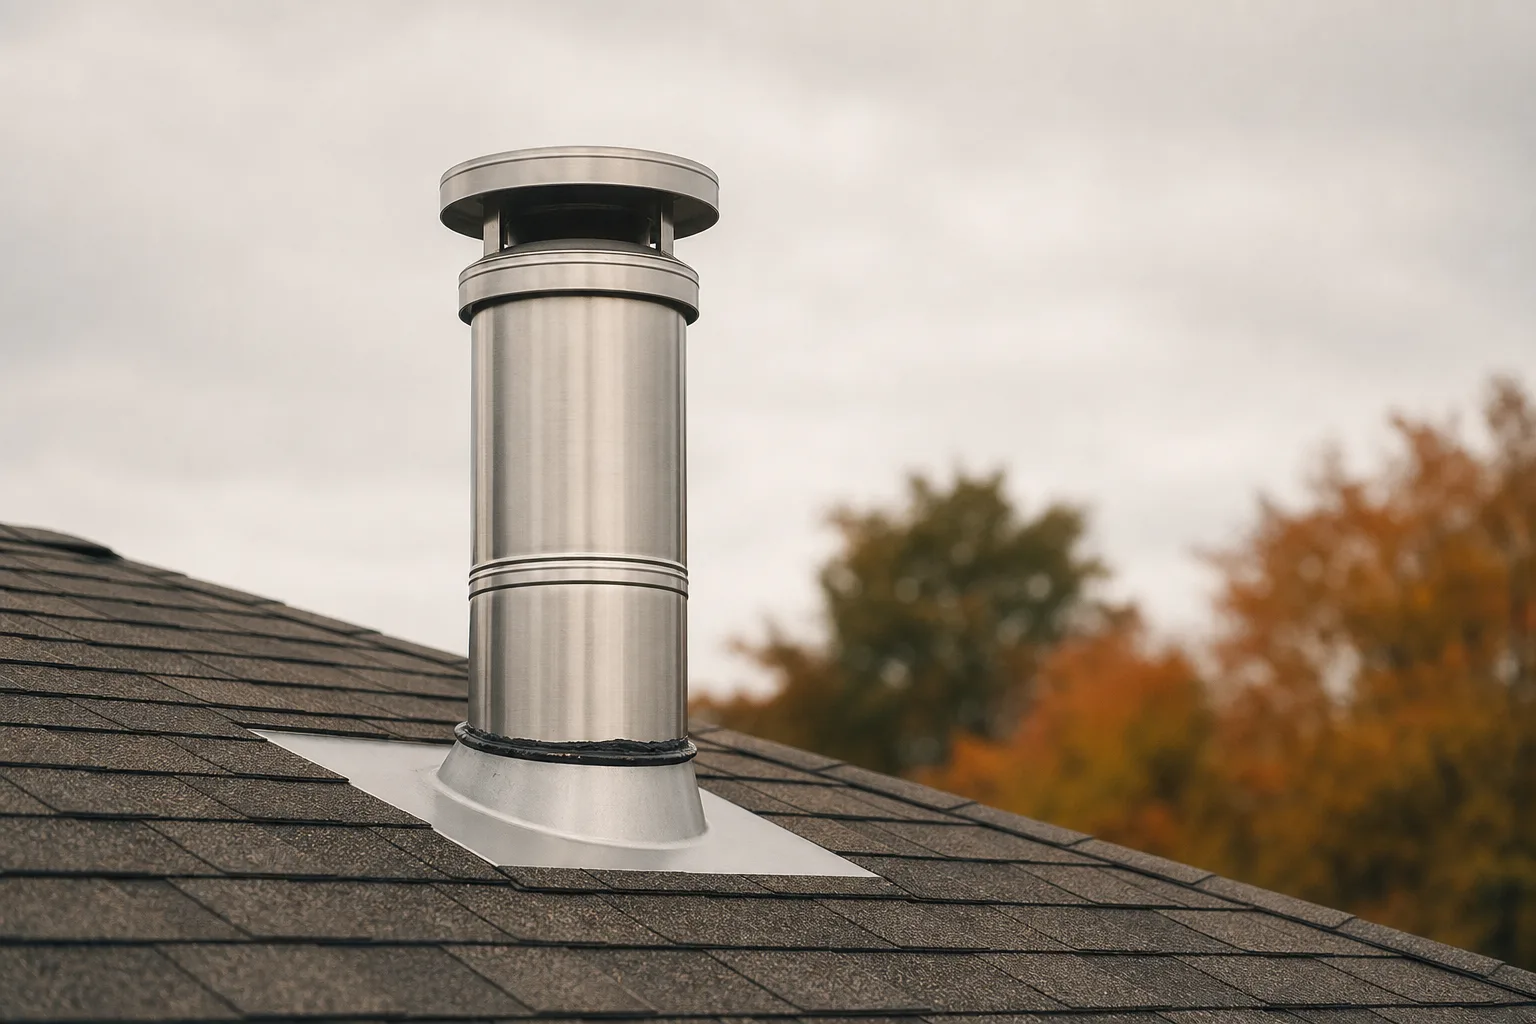
With those three numbers in hand, every kit listing you read stops being a guess. You will know whether the box is a system or a down payment on one, and that is the whole difference between a wood stove chimney kit that arrives complete and one that costs you two more shipping charges and a weekend.
Go measure. The stove will still be there when you get back.
Ready to have your wood stove chimney kit installed?
We connect you with independent chimney companies in your area. Ask every one of them to put the estimate in writing before any work starts.
Request service: (513) 655-6702
Symptom checker
What is your chimney doing?
Tap the closest match for an honest first answer.